Support Articles
Installation & Setup
Get set up fast by following these installation and setup instructions.
Install Channels DVR Server
The first thing you’ll need to do is to download Channels DVR Server and install it on your appropriate platform. Channels DVR Server is available for macOS, Windows, Linux, Raspberry Pi 4, and most major NAS providers.
Visit our Channels DVR Server page to download and install Channels DVR Server for your platform.
Read the install notes for your platform to ensure a successful installation.
Video Guide
Setup
Now that you’ve got Channels DVR Server installed on your system, you’ll need to complete the setup.
Visit http://127.0.0.1:8089 in a browser on the computer that you installed Channels DVR Server on. This will take you to the web admin and take you through the setup process.
Note: If you’re installing on a NAS or using another computer to set up Channels DVR Server, find the IP address of that computer and use it to visit the web admin on port 8089. http://$IP_ADDRESS:8089
Log In
Upon loading the web admin, you’ll be asked to log in. Click the button to authenticate with Channels.

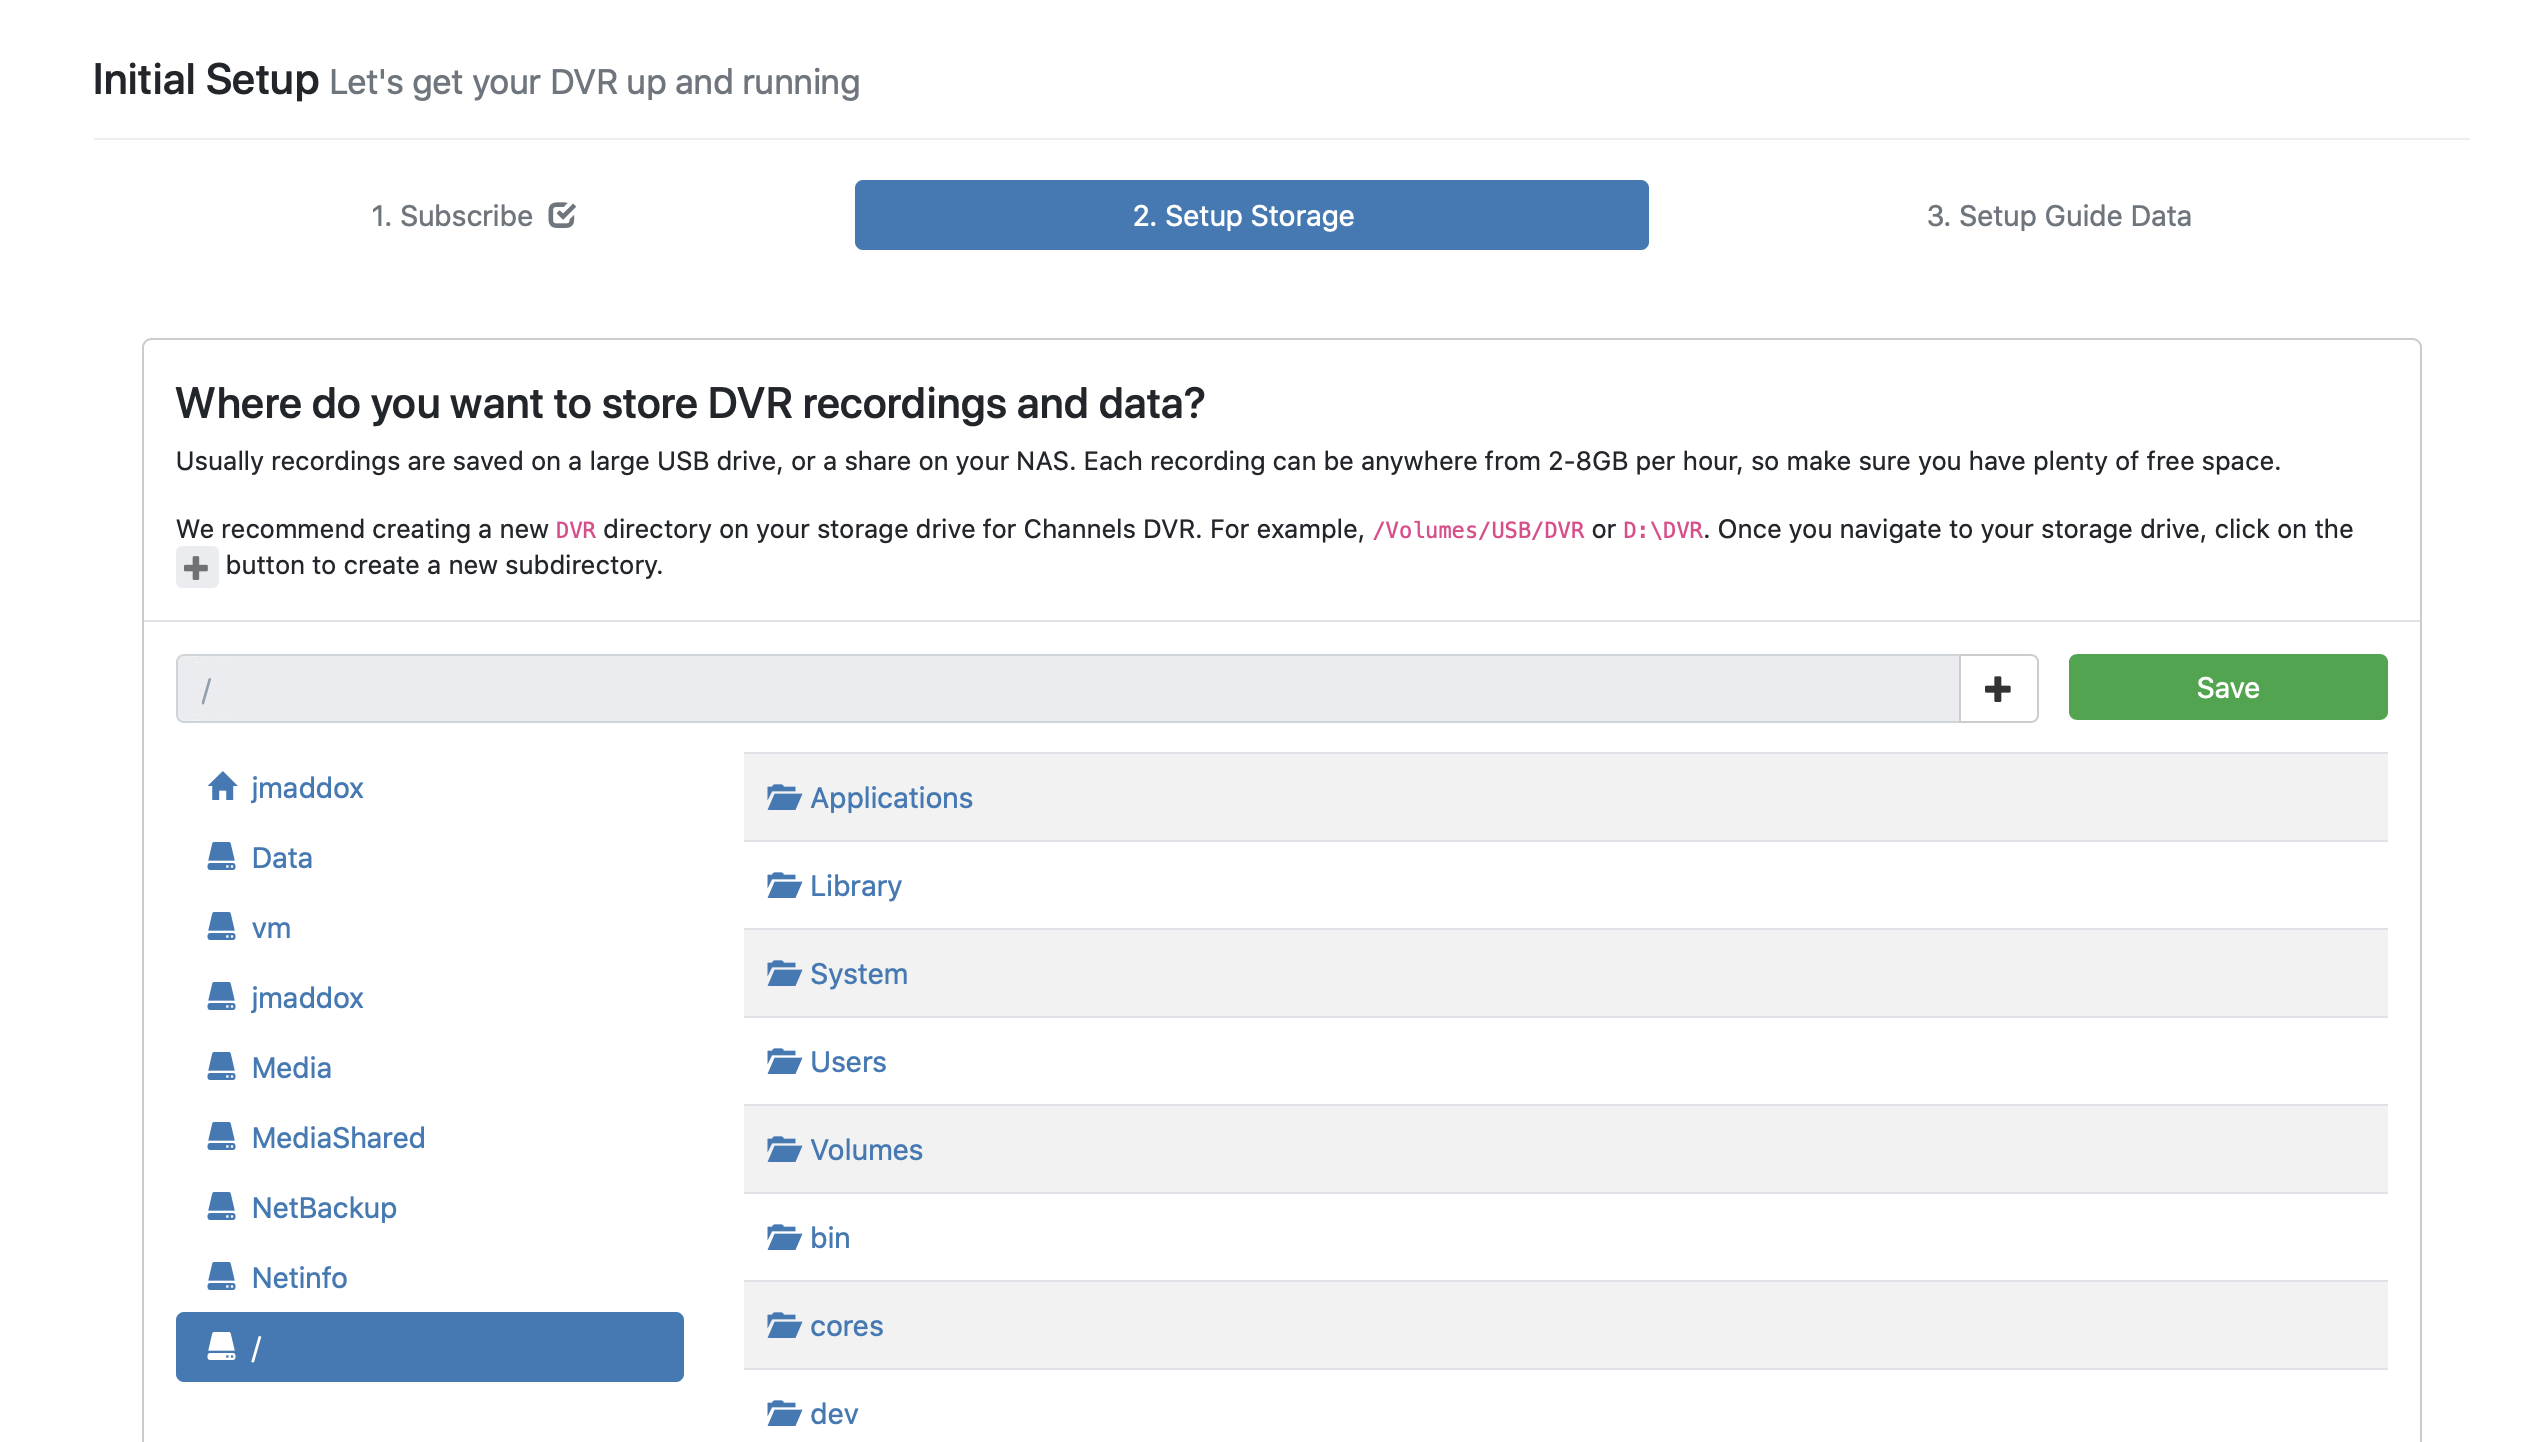
Choose your Recording Directory
Once you’re logged in, you’ll be taken through a wizard to set up Channels DVR Server.
The first thing you need to choose is where you want your recordings to be stored. You’ll want to choose a directory on a hard drive that has a lot of free space. This may be an external hard drive or one of your shared volumes on your NAS device.
Note: We suggest you create a new empty directory dedicated to the storage for your recordings.
Set Up Your Source
Next, you’ll want to add your sources. Channels DVR Server will automatically discovery any HDHomeRun TV tuners. You can manually add TV Everywhere sources as well.
HDHomeRun
Channels DVR Server will discover your HDHomeRun TV tuner. You will be asked to add a lineup to your device.
Choose your country and enter your zipcode to search for your lineup. Pick the appropriate lineup from the search results and choose Save.
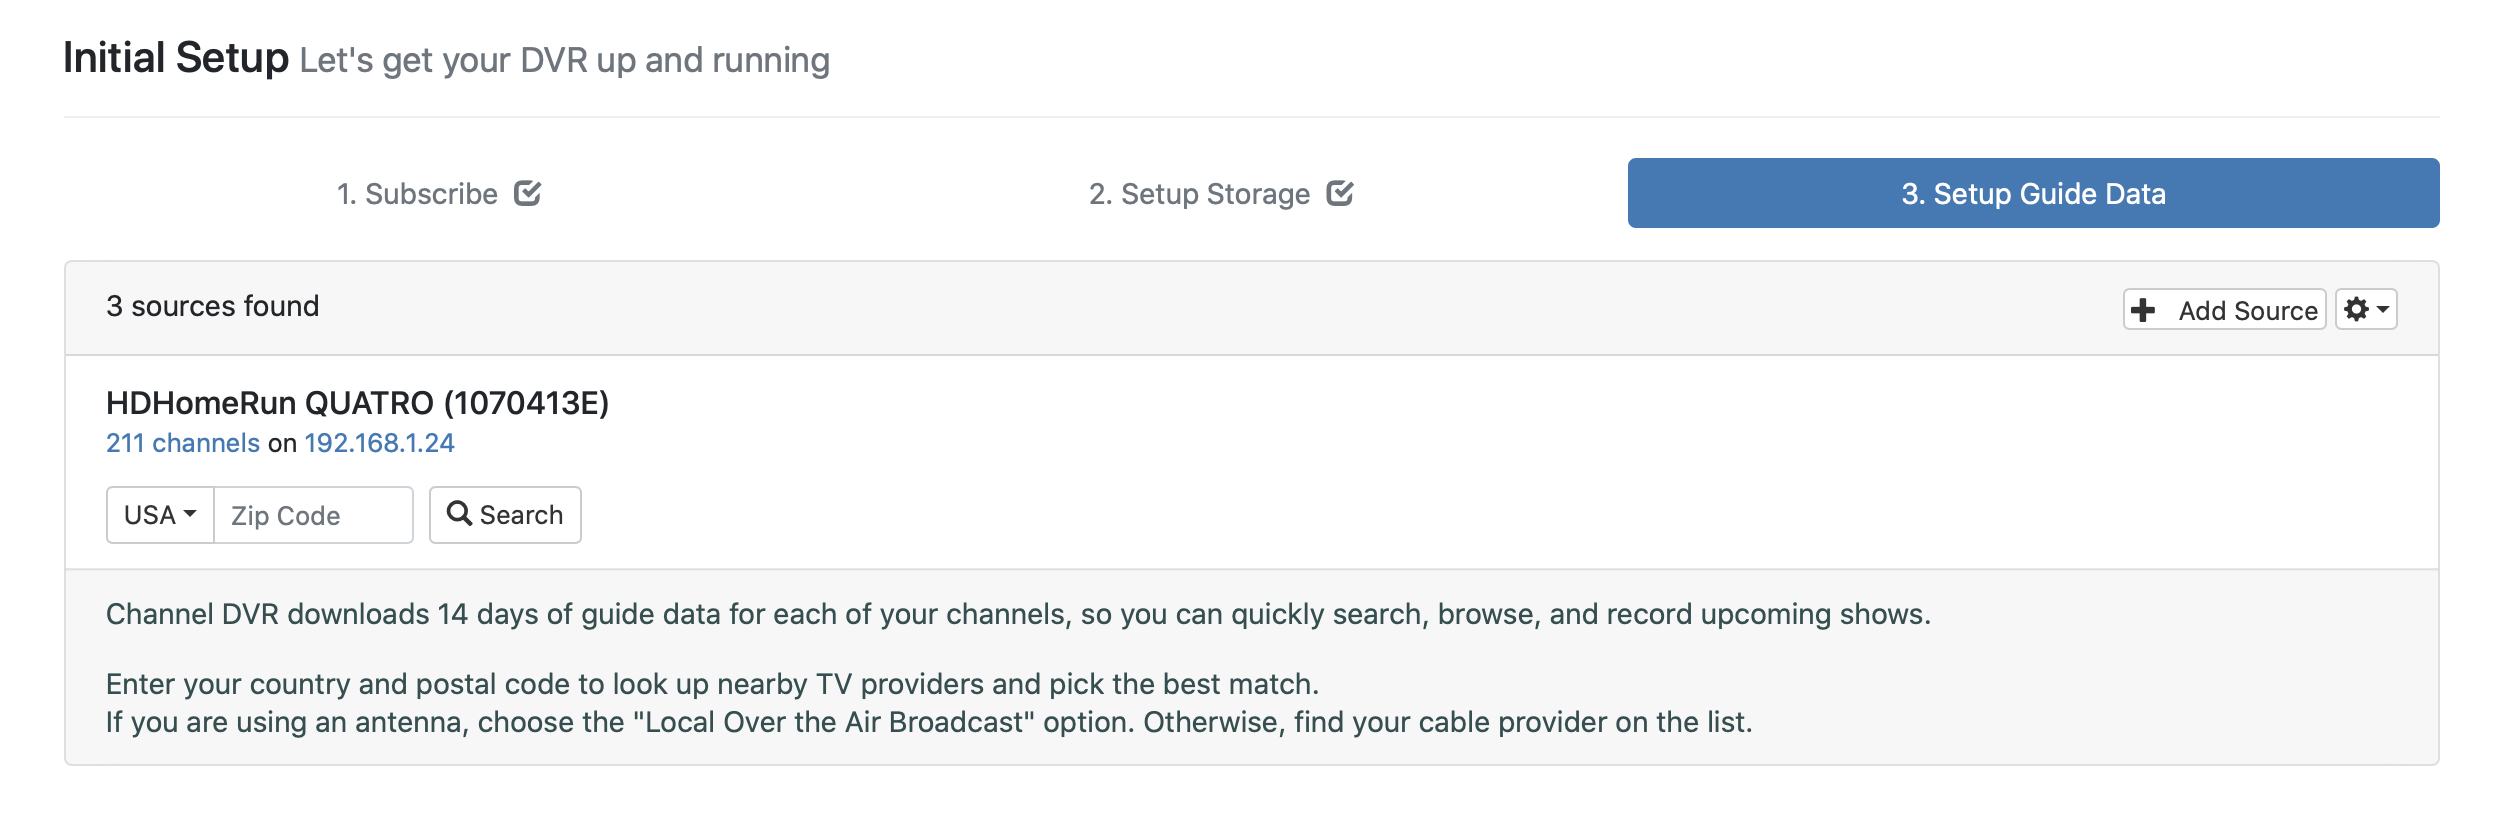
Your guide data will now begin loading. This will take a big while Channels DVR Server loads 14 days of guide data for you.
Video Guide
TV Everywhere
If you are using your cable or streaming account as a source in Channels DVR Server, you can simply choose the Add Source button.
This will prompt you to manually add a source.

Choose the source type and you will be prompted to log in with your account.
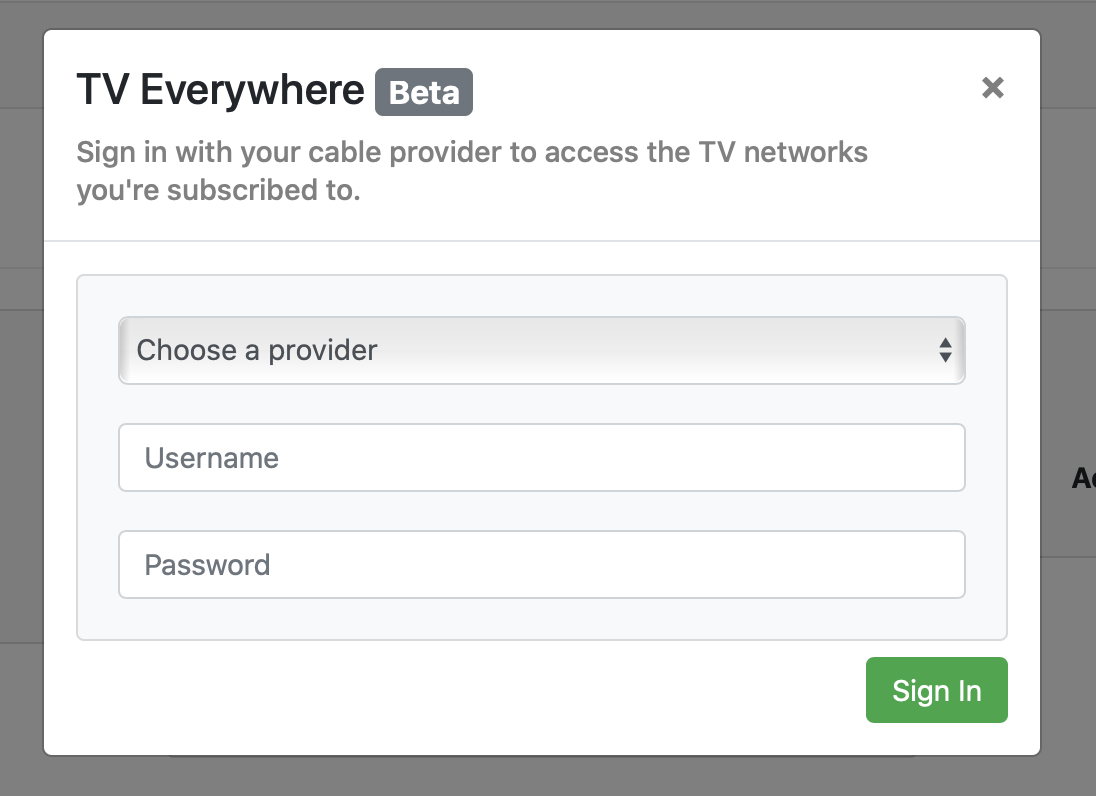
Once logged in, Channels will begin scanning for the channels that you receive. It will then load guide data for your channels.
Note: Get help with issues while authenticating with your provider.
Video Guide
Finish
Your Channels DVR Server is now set up. Let it finish fetching guide data before using it with Channels.
Once everything is complete, you should be able to open Channels on your preferred platform and you’ll be ready to watch and record TV.
Get Help
If Channels can’t discover your server automatically, read here for info on troubleshooting.
Get more help on our Support page or with our Channels Community.
