Support Articles
Stream Remotely
Channels gives you the ability to stream your recordings and live TV from anywhere in the world. For this to work, you’ll need to make sure a few things are set up correctly.
Requirements
These are the things that need to be set up correctly before you can stream with Channels while away from home.
- Remote Streaming needs to be enabled in Channels DVR Server
- Your home network router needs to route outside traffic to your Channels DVR Server correctly.
- You need to connect to your Channels DVR Server from your Channels app.
- Your server should not be on a VPN. If so, your remote IP address will be published incorrectly and Remote Streaming will not work.
Note: Read here to help troubleshoot any issues you’re having with remote streaming.
Enabling Remote Streaming
- Go to your Channels DVR Server’s web admin.
- Find Remote Streaming under the General section in Settings.
- Click Automatic to enable Remote Streaming.
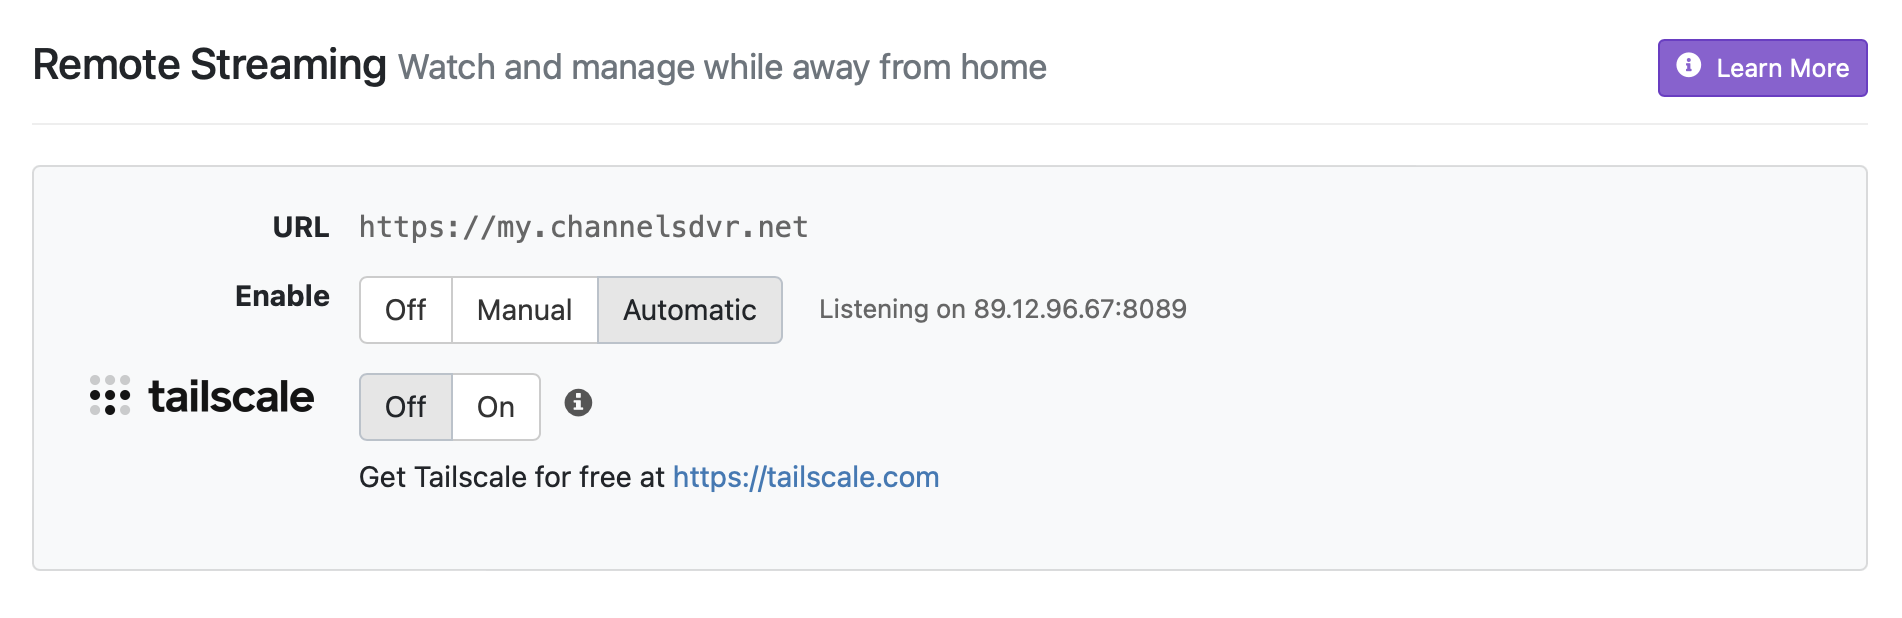
At this point, Channels DVR Server will configure itself to support secure remote streaming.
Router Setup
After turning on Remote Streaming for the first time, it should attempt to configure your router automatically. For most routers, this will work successfully. For some routers, you will have to configure them manually.
Channels DVR Server will tell you if your router requires a manual configuration. If so, switch the Port Forwarding option to manual.
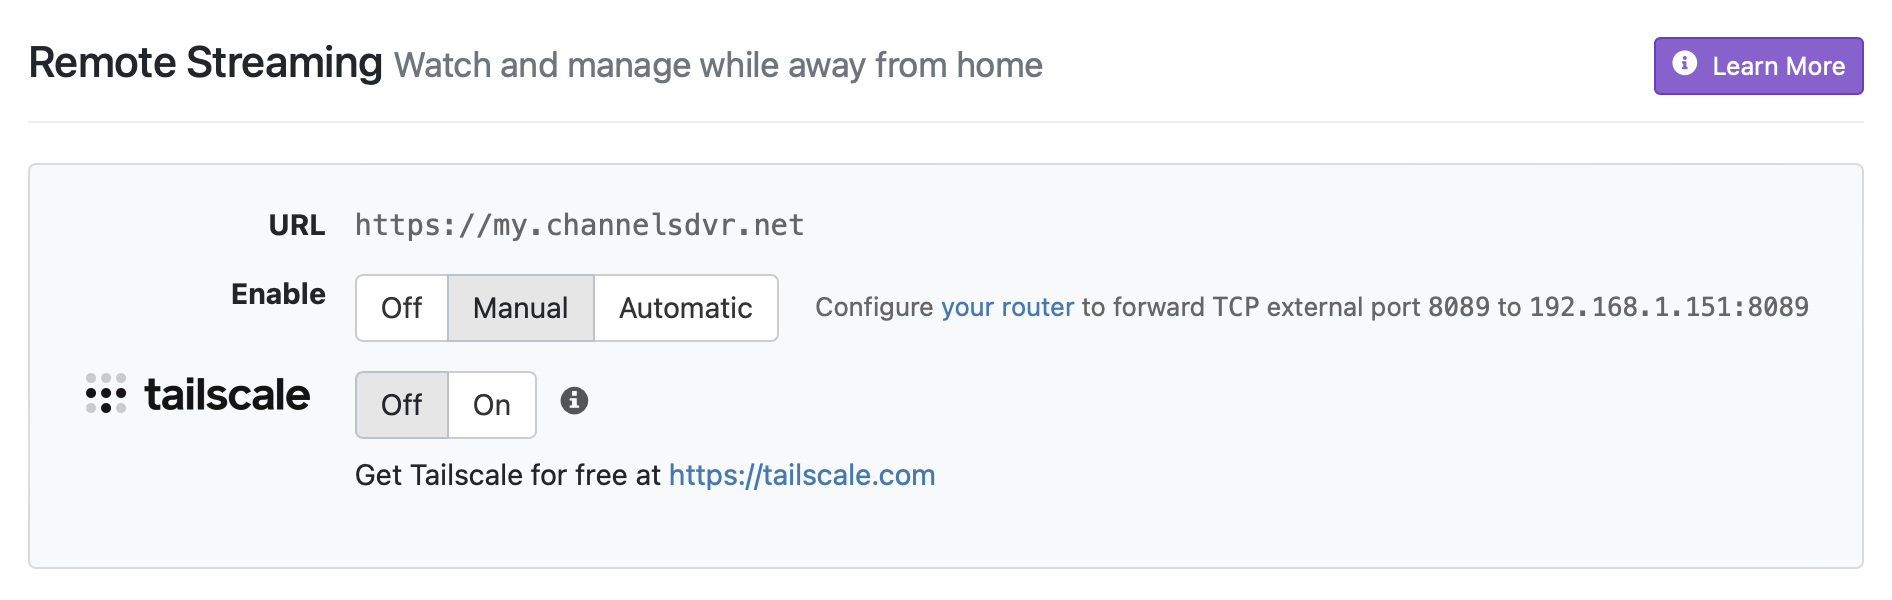
You will now have to continue by configuring your home network router.
Port Forwarding
Channels DVR Server runs on port 8089. You will need to configure your home network router to forward all external network traffic on port 8089 to the internal IP address of the computer your Channels DVR Server runs on.
Information you’ll need
- External Port: 8089
- Internal Port: 8089
- IP Address: The IP Address of the computer running Channels DVR Server. This will look like one of these:
192.168.1.45or10.0.0.72.
Forward the port
All routers are different with different mechanisms for forwarding ports. It’s impossible to document the process on every router, but we can give an overview of what you need to do.
You should find the Port Forwarding section of your router. This is sometimes found under the Security or Firewall settings. You need to create a new rule using the information provided above.
You are redirecting all external network traffic on port 8089 to port 8089 on the computer you have Channels DVR Server running on.
Protip: Once you think you’ve configured your router correctly, visit https://my.channelsdvr.net to attempt to connect remotely.
Instructions for popular routers
The following are links to instructions for popular routers. These instructions should help you get your port forwarded and get you remotely streaming with Channels in no time.
- Apple Airport Extreme - Instructions
- Eero - Instructions
- Orbi - Instructions
- TPLink - Instructions
- Netgear - Instructions
- Xfinity xFi - Instructions
- Verizon FIOS - Instructions
- Unifi - Instructions
Tailscale
Some internet providers do not have true public IP addresses and therefor, port forwarding is not possible. These types of providers are called CGNAT. In this case, you can use the built in Tailscale support to connect to your Channels DVR Server remotely.
Tailscale is a simple and free VPN designed to connect your devices together securely.
- Turn on Tailscale in the Remote Streaming section of Settings.
- Link your Tailscale account with your Channels DVR Server.
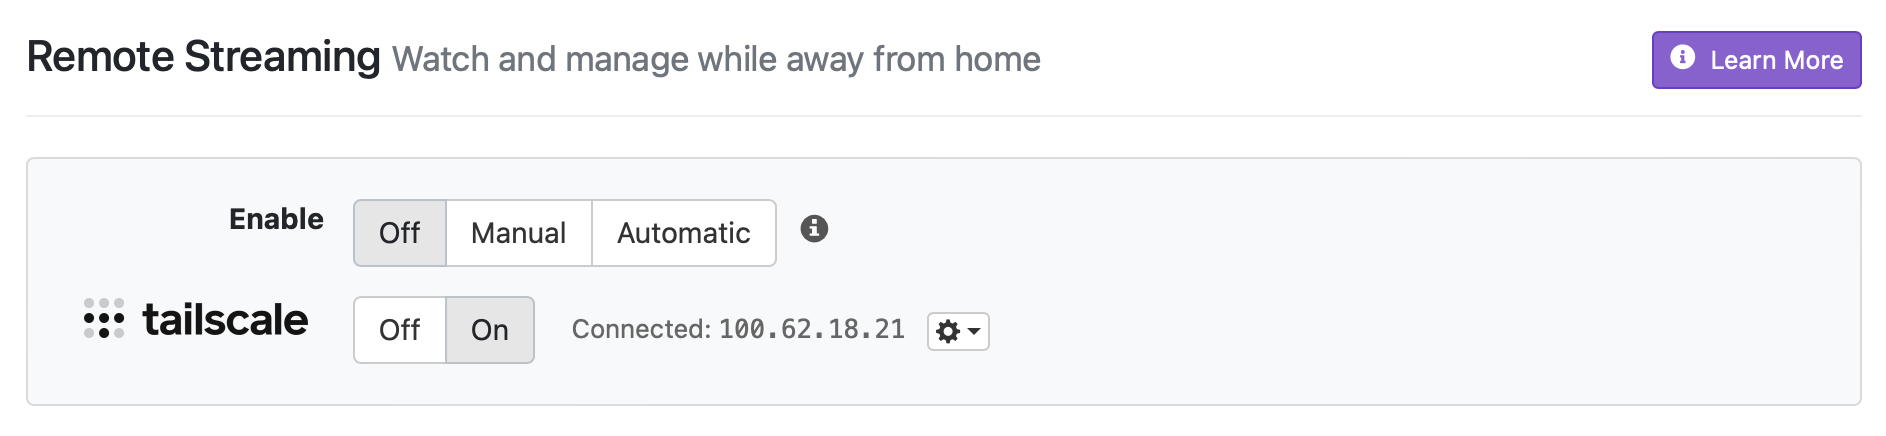
Once your Tailscale account is linked, your Channels DVR Server will appear as its own device in your Tailscale account. You can now connect to it via its IP address and Port 8089 from any device that is also connected to your Tailscale account.
Note: Connecting to your Channels DVR Server via Tailscale from a remote device will require you to download and install Tailscale on that device. Tailscale is available for tvOS/iOS and Android.
Connect to Channels
From within the Channels app, you’ll need to connect to your Channels DVR Server at home. Follow the instructions below to connect, authenticate, and connect to your home over a secure connection.
Remote Streaming
If you are using Remote Streaming with port forwarding enabled, use the Connect button on the welcome screen when you open the app.
- Click the Connect button.
- Choose Away From Home.
- Authenticate with your Channels account
Tailscale or other VPN
Using Tailscale or other VPNs make your device think they are still at home on your home network. In this case, use the Connect button and choose the At Home option.
- Ensure your device is connected to Tailscale or your VPN.
- Click the Connect button.
- Choose At Home.
- Enter the IP address of your Channels DVR Server’s Tailscale or VPN address.
Happy Streaming!
